Contact Settings
The Contact Settings section allows you to configure which fields appear in the contact add/edit forms. It supports default fields and custom field management, making it adaptable to varied organizational needs.
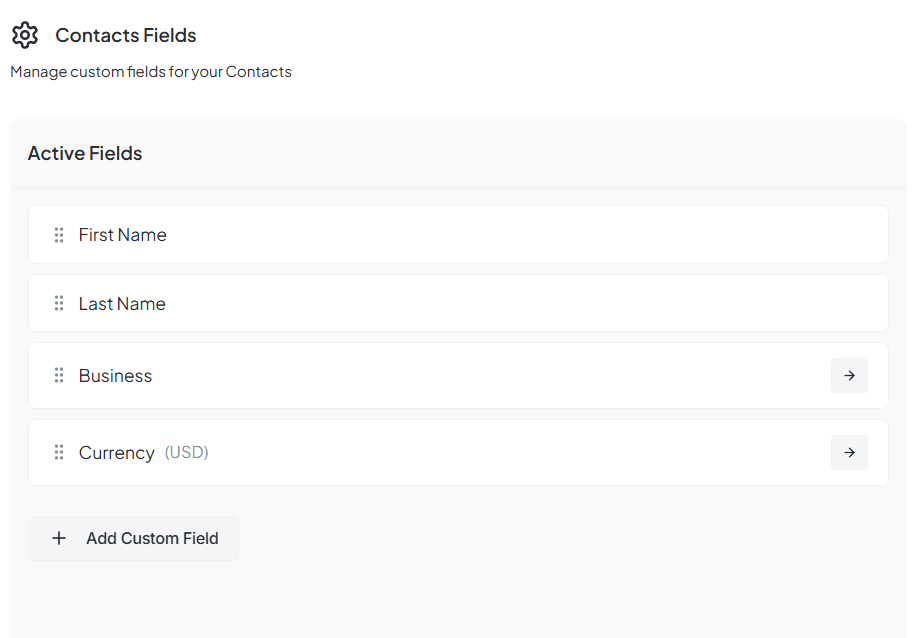
Active Fields
Description
These are the fields currently visible on the contact form. They are displayed in the left section under Active Fields. You can reorder the fields by dragging or clicking the arrow buttons.
First Name
Contact's first name
Business
Business name associated with the contact
Currency (USD)
Preferred currency for the contact
File Number
Internal file reference
Date of Formation
Company or entity registration date
Email Address
Primary contact email
Address Field
Address
Mailing or billing address
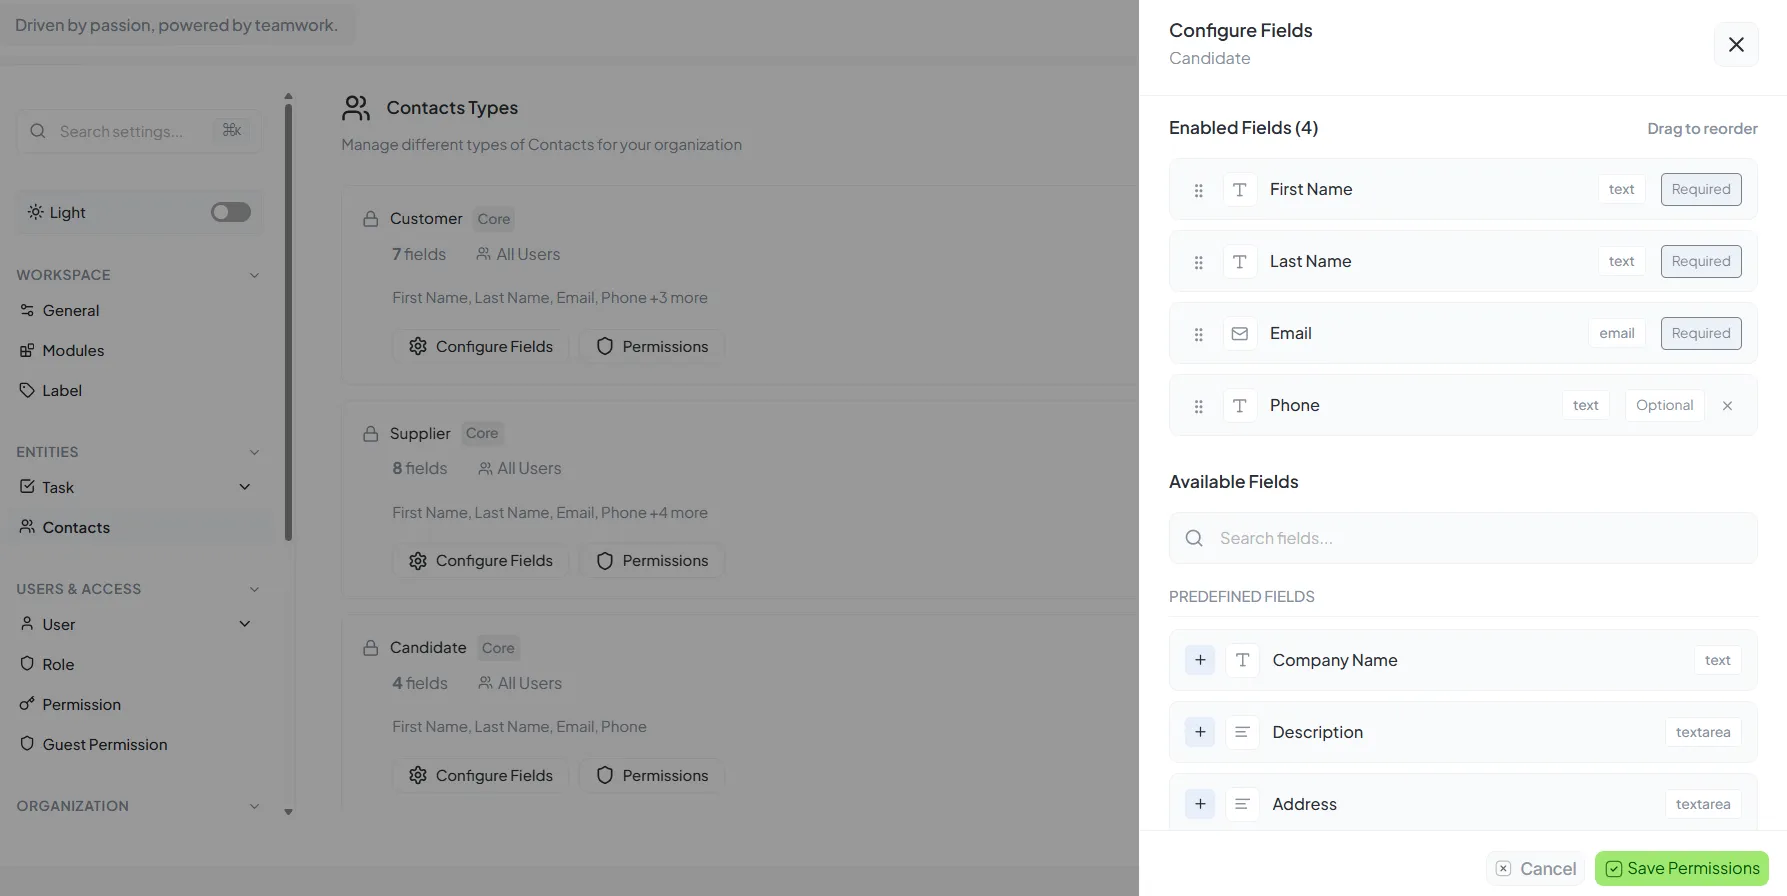
Available Fields
Field List Configuration
Contact Form Layout
Advanced configuration interface for contact fields and layouts
Description
These are predefined fields that can be optionally included in the contact form. Located in the right section under Available Fields. You can add a field to the active list by clicking the ← arrow next to it.
Last Name
Phone
PAN Number
Country
Tax Treatment
Attention
City
Postal/Zip Code
Add Custom Field
Description
You can create and manage custom fields to collect additional information. Each custom field includes Label, Type, Edit/Delete Controls, and Order Handle for rearrangement.
Supported Field Types
Example Custom Field
Test
Type: Text (editable and removable)
Contacts Type
Contact Types interface for managing contact categories
Overview
Use Contacts Types to categorize the people/organizations in your workspace (e.g., Customer, Supplier, Candidate). Types control how contacts are grouped, filtered, and sometimes which fields or workflows they use.
Who Can Manage
Admins/Owners
or roles with Settings → Contacts permissions
What a "Type" Does
Adds label for filters, lists, and reports
Can drive default fields and workflows
Helps enforce separation between categories
Default Types
The workspace ships with common types like Customer, Supplier, Candidate (locked icon indicates system/default; you can usually rename but not delete them).
Customer
System default type
Supplier
System default type
Candidate
System default type
Add a New Contacts Type
Steps
Go to Settings → Contacts → Contacts Types
Click ➕ Add Contacts Type
Enter Type name (e.g., Partner, Lead, Vendor)
Configure optional settings
Save
Optional Configuration
Description
Internal help text
Default fields layout
Choose which custom fields show for this type
Default list/view
Which saved view or pipeline this type opens in
Tip: Keep names short and mutually exclusive. If two types overlap, users will be unsure which to pick.
Rename
Click type and edit name. Updates reflect everywhere
Reorder
Drag types to change display order in pickers
Delete
Only for non-system types with no contacts assigned
Map Fields to a Type
If your product supports per-type fields:
Steps
Go to Settings → Contacts → Custom Fields
Create fields (e.g., GSTIN, Contract Value)
In Visibility section, select which Types show field
Save
Result
Dynamic Field Display
When user picks a type, relevant fields appear automatically
Using Types in Day-to-Day Work
Create/Edit Contact
Choose Type from dropdown
Filters
Filter by Type in Contacts list
Reports
Group or segment by Type
Automations
Trigger rules based on type