Task Settings
Configure how tasks behave and what users see in the Task module. All options below are workspace-wide unless noted. This section outlines the customization and configuration options available in the Task Settings panel. These settings allow administrators to control task workflows, statuses, priorities, and verification processes.
Basic Features
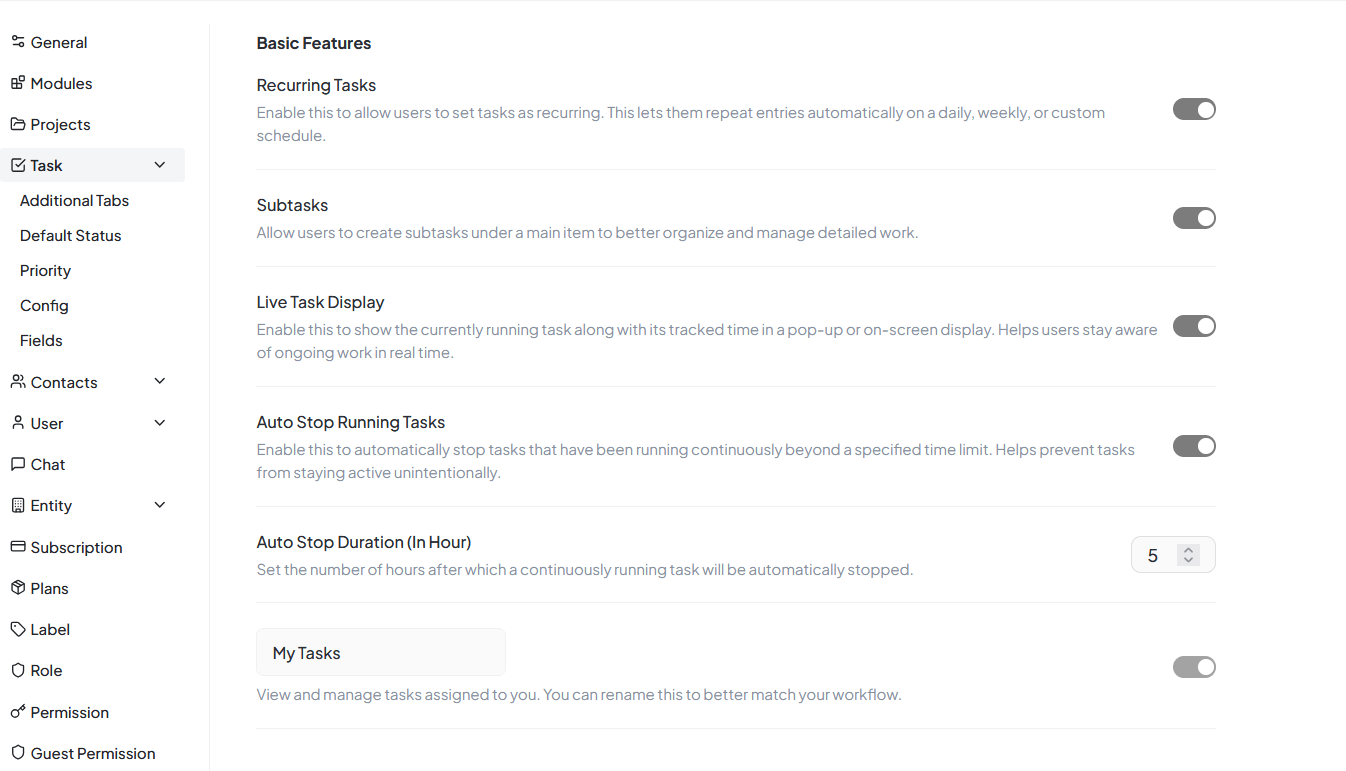
Task Settings Basic Features interface for task configuration
Recurring Tasks
Purpose
Let users create tasks that repeat (daily/weekly/monthly/custom)
Where used
Task → "Repeat" (when enabled)
Notes
Recurrences create future instances; closing one doesn't auto-close others
Subtasks
Purpose
Allow parent tasks to contain smaller checkable items with independent assignees/dates
Best practice
Keep subtasks <10; promote to full tasks if they have owners or dependencies
Live Task Display
Purpose
Show floating/on-screen timer for currently running task
Impact
Improves awareness of active timers; useful for billing/SLAs
Auto Stop Running Tasks
Purpose
Auto-stop task timer if it exceeds set limit (prevents overnight timers)
Paired with
Auto Stop Duration (In Hour) – numeric field to set threshold
Example
Set to 5 hours to stop any continuous run after 5h
My Tasks Label
Purpose
Rename the "My Tasks" section in sidebar to your terminology
Scope
Navigation label only; doesn't change filtering logic
Team Tasks
Purpose
Show shared "Team Tasks" view; label is customizable
Use case
Stand-ups and team triage
Recurrence (Sidebar Entry)
Purpose
Adds dedicated "Recurring" list in sidebar to quickly manage recurrence rules/templates
Benefit
Centralized management of all recurring task patterns and templates
Additional Tabs
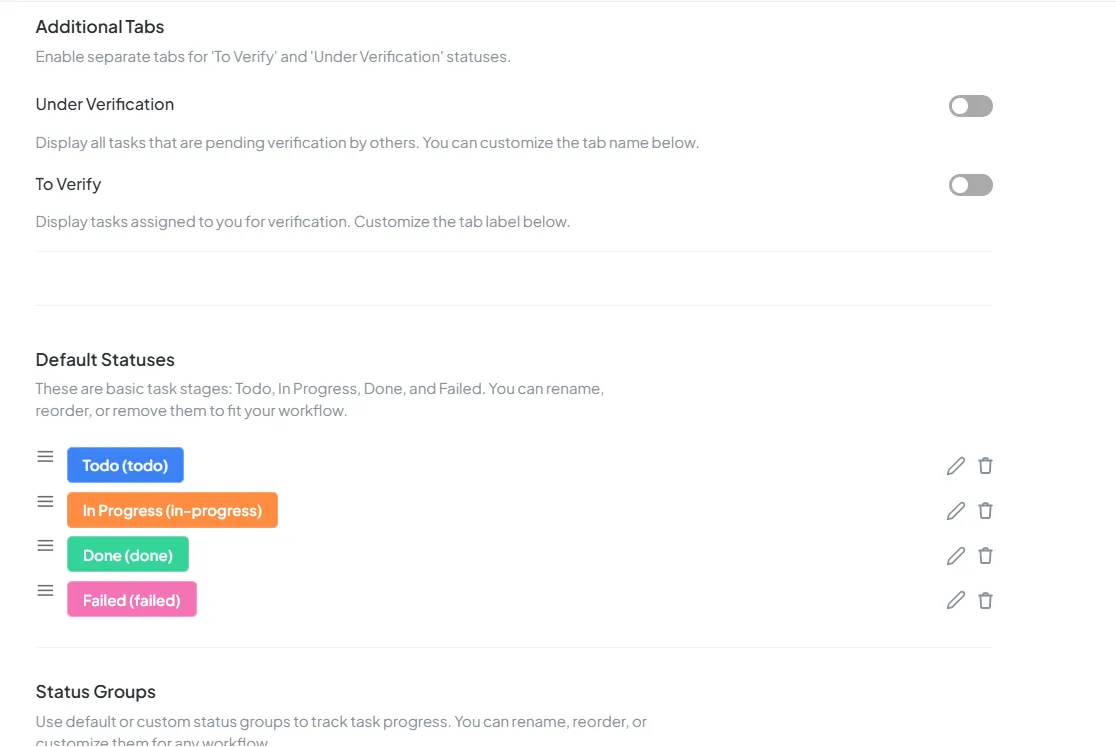
Additional Tabs Settings interface for extended task configuration
Under Verification
Purpose
View tasks waiting on verification by other roles (e.g., QA, Approver)
Tip
Pair with permissions so only verifiers can move tasks out of this stage
To Verify
Purpose
Tasks assigned to you for verification
Hide Verification Tasks From Completed List
Purpose
Keeps "Completed" clean by removing verification items from that view
Benefit
Cleaner completed task view focused on truly finished work items
Default Statuses
Default Statuses interface for managing task status configurations
What It Is
Baseline workflow: Todo, In Progress, Done, Failed. You can rename, reorder (drag), or delete to fit your process.
Actions Available
Guidance
Keep terminal states mutually exclusive (e.g., Done vs Failed) for clean reporting
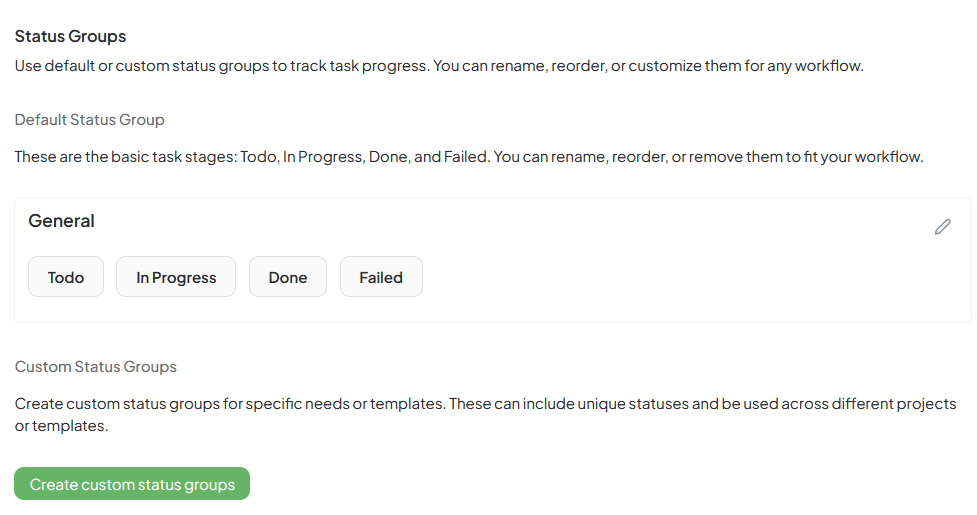
Status Groups
Default Status Group
Contents
The baseline statuses under General
Use case
Global/default workflow for most projects
Create Custom Status Group
Go to Settings → Task → Status Groups
Click Create custom status groups
Name the group and add statuses
Edit / Duplicate / Delete
Edit
Rename group or statuses; reorder; update rules
Duplicate
Use as starting point for similar process
Delete
Only if group isn't actively assigned
Attach a Status Group
A) Task Template
Templates → Task Templates → Edit
Set Status Group to your custom group
Save the template
B) Project Default
Projects → (Project) → Settings
Choose Default Template with desired Status Group
New tasks will default to it
Priority Labels
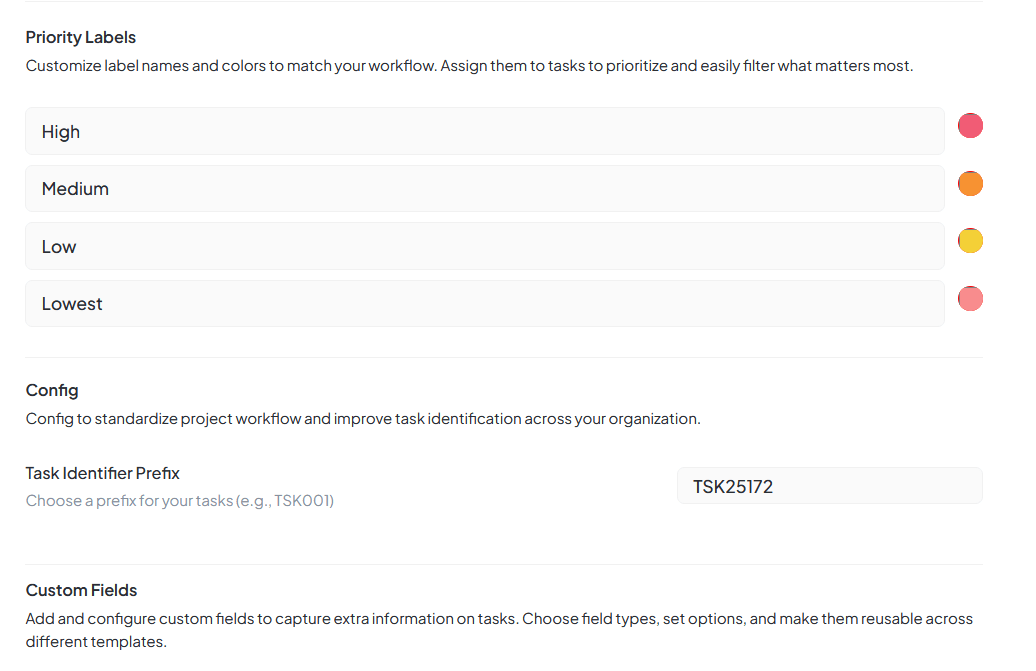
Priority Labels interface for managing task priority configurations
Purpose & Usage
Function
Set names and colors of priority levels (default: High, Medium, Low, Lowest)
Appearance
Shows in task forms/filters and list/board badges
Default Priority Levels
Task Identifier Prefix
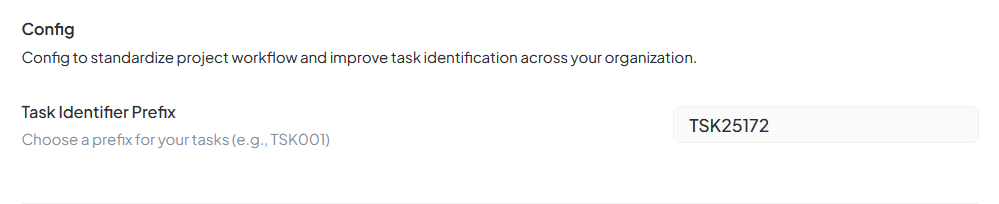
Task Identifier Prefix Configuration interface
Purpose
The Task Identifier Prefix ensures that every task created in the system has a unique and standardized identification number, making it easier to track, search, and manage tasks across the organization.
Configuration
Navigate to Config → Task Identifier Prefix
Set custom prefix for your tasks
Example: TSK generates TSK001, TSK002, TSK003
Automatic Generation
Format
[Prefix] + [Incremental Number]
Examples
TSK001, TSK002, TSK003
Ensures
No two tasks have same identifier
Benefits
Unique Identification
Avoids confusion between similar tasks
Quick Search
Use identifiers in search bar
Standardized Workflow
Same format across projects
Scalable
Works as task count grows
Custom Fields
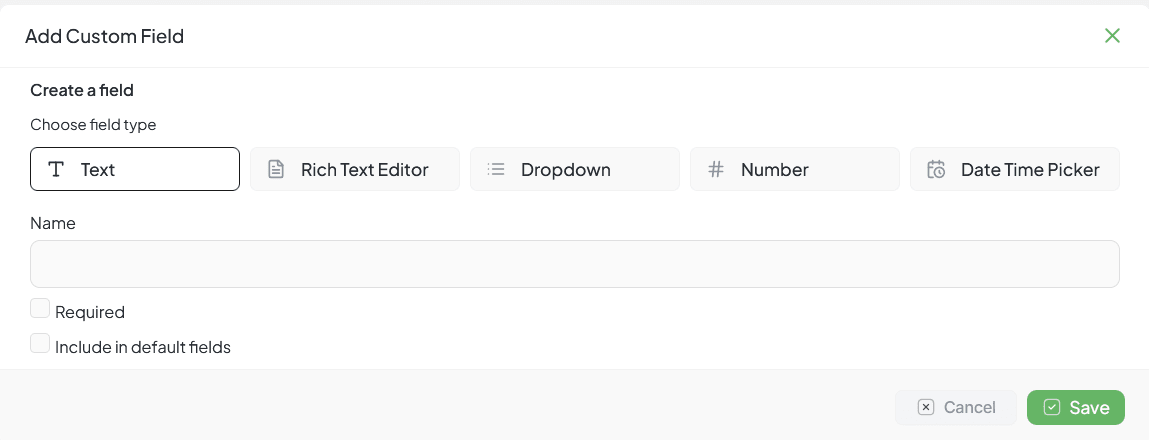
Custom Fields interface for adding custom field configurations
Purpose
Add extra structure to tasks beyond the defaults. Fields created here can be reused across templates/projects (subject to your product's scope rules).
Field Types
Text
Single-line free text
Rich Text
Multi-line with formatting
Dropdown
Predefined options
Number
Numeric input
Date Time
Date or date-time picker
Create Custom Fields
Go to Settings → Task → Custom Fields
Click ➕ Custom Field and choose Field Type
Set Name (label users see)
Configure optional settings
Click Save
Options
Name
Display label for the field
Required
Must be filled before saving a task
Include in default fields
Surfaces field in default task layouts
Using Custom Fields in Tasks
Click New Task (from anywhere you can create tasks)
Choose Template (dropdown or picker)
Form refreshes with Custom Fields attached to template
Fill required and optional fields
Save the task
Note: To guarantee a field appears, attach it to the template you expect the team to use