Template Overview
Templates are reusable task structures that define fields, workflows, and permissions for task creation. Instead of creating tasks freely, every task in Hidesc is created from a template, ensuring consistency and capturing all required information.
Templates allow organizations to standardize workflows across departments while still accommodating specific needs through custom fields and approval stages.

Template list showing all available templates
Why Use Templates?
Consistency
Every task follows a structured format, maintaining uniformity across departments
Compliance
Capture all required information for specific workflows or regulations
Efficiency
Predefined fields reduce time spent configuring each task
Control
Define who can create, view, and approve tasks from each template
Creating a Template
Go to Templates
Navigate to Settings > Templates
Click Create Template
Click the "Create Template" button
Enter Basic Details
Template name, description, and icon
Configure Fields
Add standard and custom fields
Set Permissions
Define who can use this template
Configure Workflow
Set up status groups and approval stages
.webp)
Template creation form
Template Fields
Templates can include standard fields as well as custom fields to capture specific information:
Standard Fields
Task Title
Name of the task
Description
Detailed task description
Assignee
Person responsible for the task
Due Date
When the task should be completed
Priority
Importance level of the task
Status
Current state of the task
Custom Field Types
| Field Type | Use Case |
|---|---|
| Text | Short text entries, references |
| Number | Quantities, amounts, counts |
| Dropdown | Predefined options to choose from |
| Date | Date selections |
| Toggle | Yes/No options |
| File Upload | Attachments, documents |
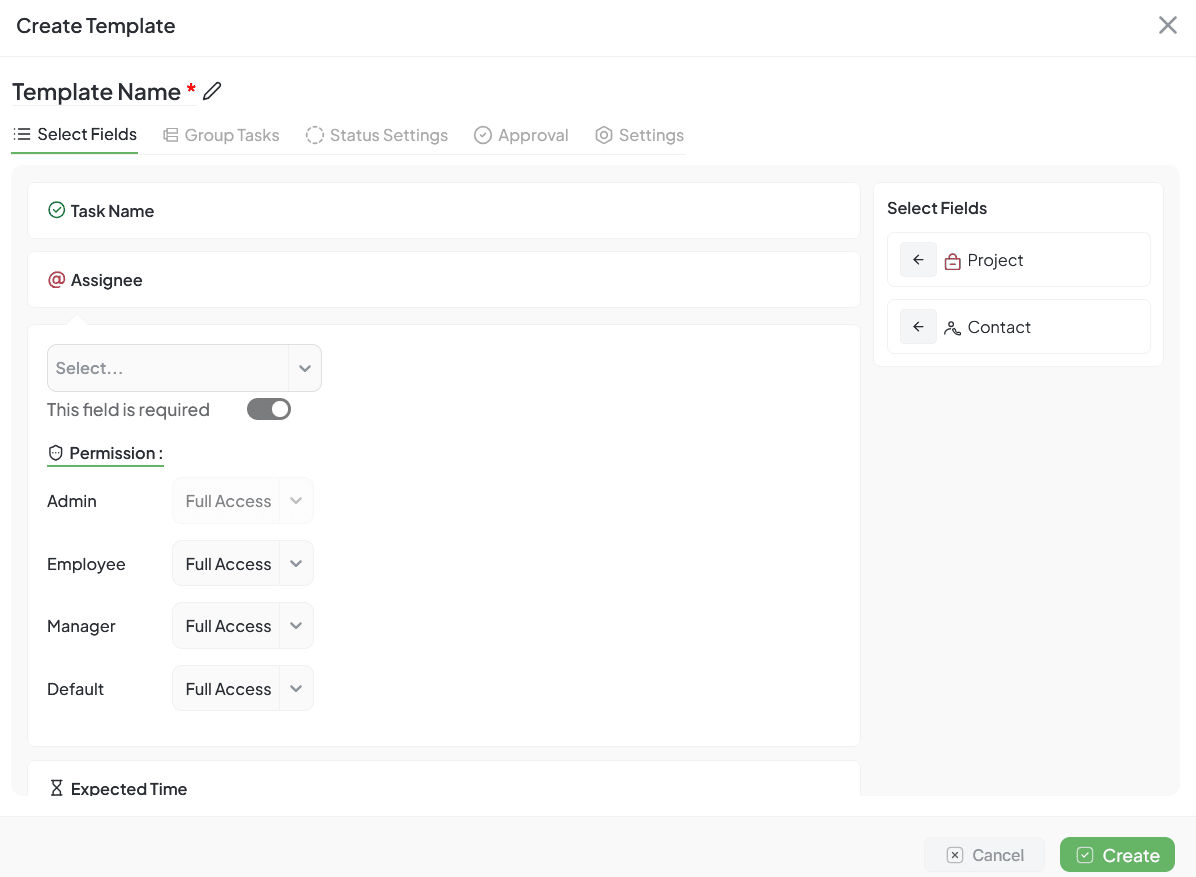
Selecting and configuring template fields
Status Groups
Templates define how tasks move through different statuses. You can create custom status groups that match your workflow.
Example Workflow
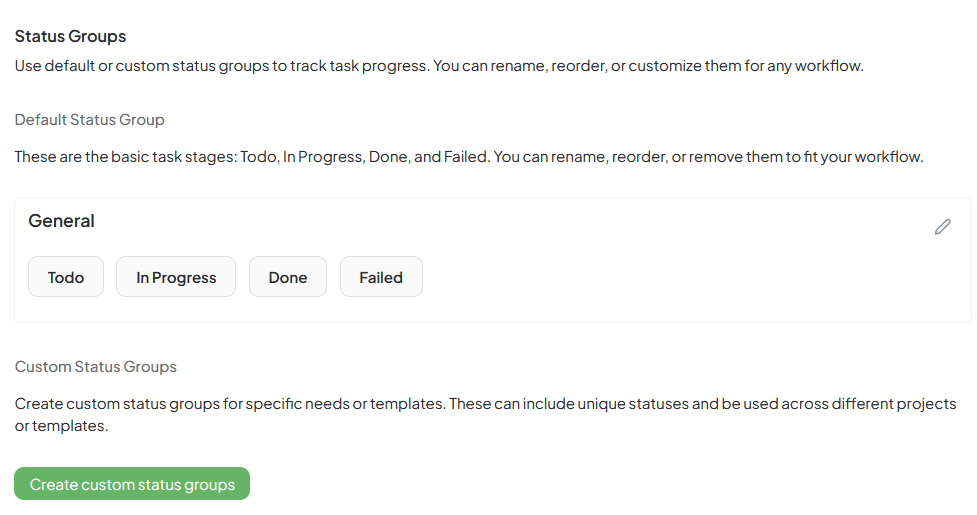
Configuring status groups in template settings
Template Permissions
Control who can use each template and what they can do:
Create Permission
Who can create tasks from this template
View Permission
Who can see tasks from this template
Edit Permission
Who can modify tasks from this template
Approve Permission
Who can approve tasks at each stage
Group Tasks
Templates can include predefined group tasks that are automatically created with the main task. This is useful for workflows that always require multiple related tasks.
Group Task Features
- Define related tasks in the template
- Set dependencies between tasks
- Configure start conditions (immediate, after previous, custom)
- Customize fields for each group task
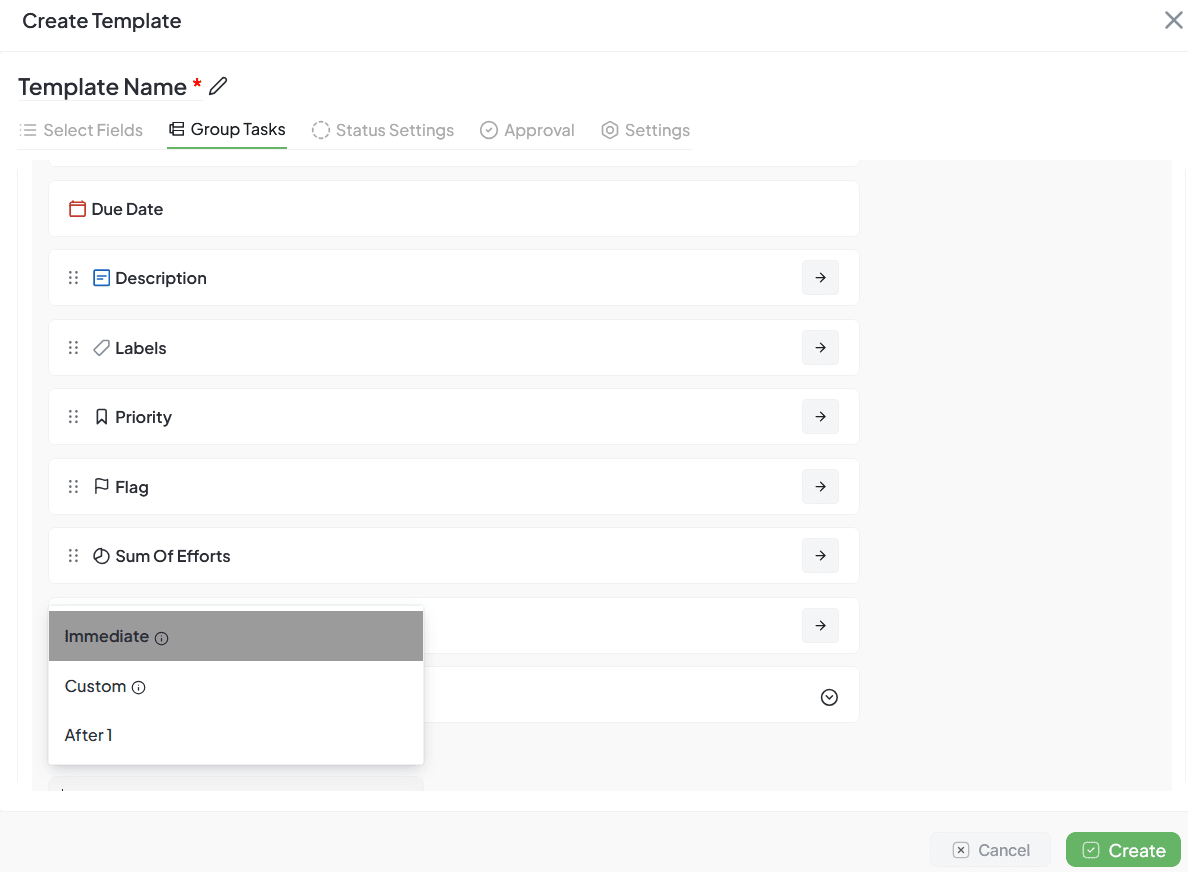
Configuring group tasks in a template
Import/Export Templates
Share templates between organizations, backup configurations, or import industry-standard templates.
Export Template
- Go to template list
- Select template(s) to export
- Click Export button
- Choose format (JSON)
- Download file
Import Template
- Go to template list
- Click Import button
- Upload template file
- Review imported template
- Confirm import
Template Use Cases
Software Development
- Sprint planning template
- Bug fix workflow
- Feature development template
- Release checklist
Marketing
- Campaign launch template
- Content creation workflow
- Event planning template
- Social media schedule
HR/Operations
- Employee onboarding template
- Offboarding checklist
- Performance review template
- Recruitment workflow
Client Projects
- Project kickoff template
- Deliverable checklist
- Client onboarding template
- Project closure checklist
Best Practices
Creating Templates
- Use clear, descriptive task names
- Include detailed descriptions
- Set realistic relative dates
- Keep templates focused
Organization
- Name templates descriptively
- Use categories/tags
- Archive unused templates
- Document template purposes
Permissions
- Set appropriate access levels
- Define create permissions
- Configure approval workflows
- Review permissions regularly
Maintenance
- Review templates regularly
- Update based on feedback
- Remove outdated templates
- Track template usage