User Management – My Team
The User Management section under My Team allows administrators and team leads to manage user roles, permissions, and departmental associations. It helps maintain structured team hierarchies and streamline collaboration across projects and tasks.
Add new users (employees, managers, or admins) to the system, define reporting structures, and integrate with the Organogram for a visual representation of your team hierarchy.
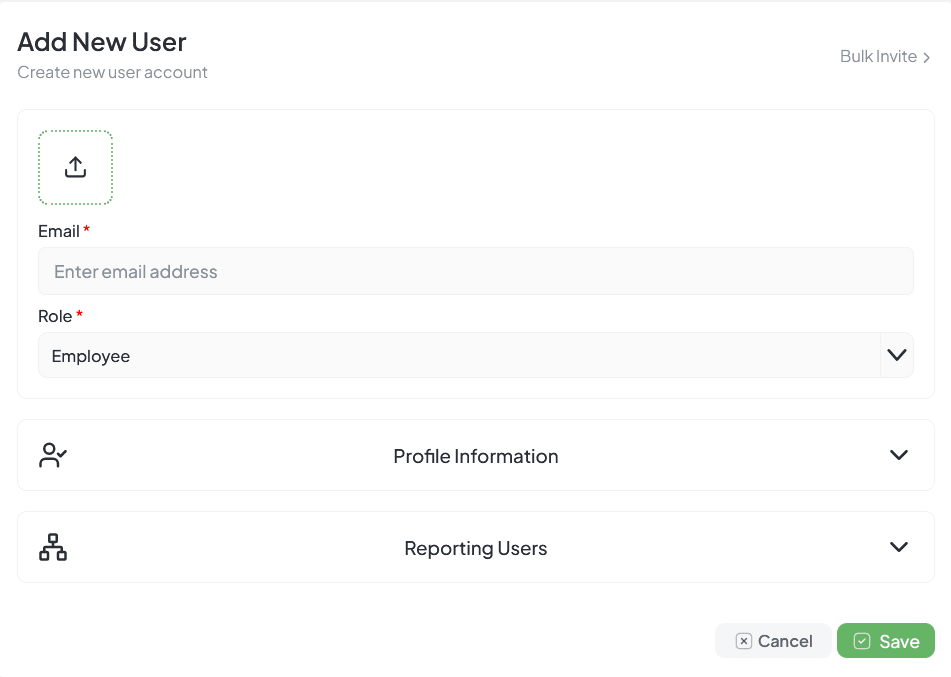
User management interface for adding team members
Core Features
Add New User
Add individual users with role, profile information, and reporting manager
Bulk Invite
Invite multiple users at once with a single role assignment
Profile Information
Capture essential employee details like name, employee code, and contact information
Reporting Structure
Define reporting lines to integrate with the Organogram
Role & Permission Mapping
Assign system roles (Employee, Team Lead, Manager, Owner, Admin) with tailored access
Adding a New User
Open Add New User
Navigate to Users → Add New User and enter required details
Enter Email and Role
Email (unique login ID), Role (Employee, Manager, Team Lead, Admin, etc.)
Profile Information
First Name, Last Name, Employee Code, Contact Number, Custom Fields
Reporting Structure
Select Reporting Manager and Team. Toggle "Immediate Reporting" if direct head
Save User
Click Save. The system sends an invite email with login setup instructions
User Roles
Each user is assigned a role that determines their permissions in the system:
| Role | Description |
|---|---|
| Admin | Full control over settings, users, and organization |
| Owner | Project or department owner with management rights |
| Manager | Oversee teams, approve tasks, manage workload |
| Team Lead | Lead a team, assign tasks, track progress |
| Employee | Work on assigned tasks and collaborate |
Bulk Invite
The Bulk Invite feature allows admins to quickly onboard multiple users by sending them invitation emails. Users can join by filling in their profile details through a secure signup link.
How to Use Bulk Invite
- Click "Bulk Invite" from the top-right of user management
- Enter multiple email addresses separated by commas
- Assign a common role and department
- Click Save to send invitation emails
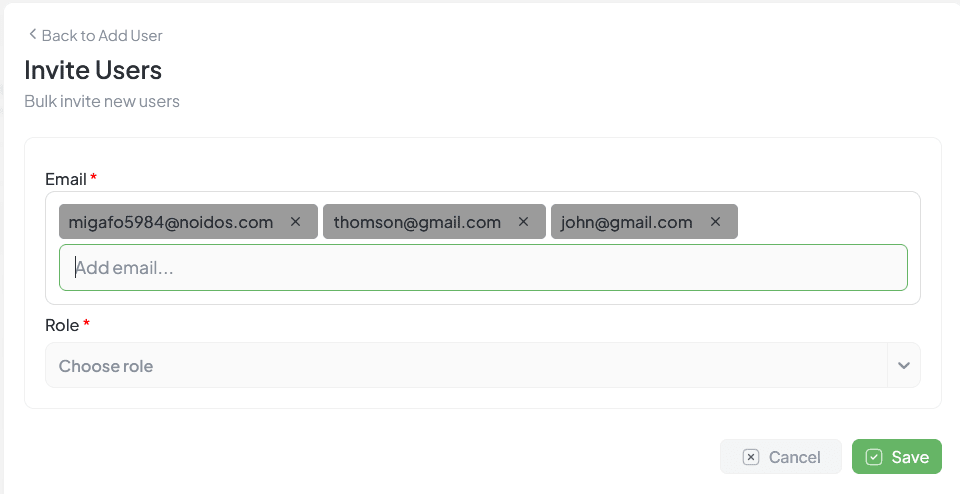
Bulk invite form for adding multiple users
Profile Page
Each user has a profile page with multiple tabs for managing their information:
Profile
Personal information and basic details
Work Profile
Role, department, and professional details
Security
Password and security options
Notification
Communication preferences and alerts
Benefits
Clear Accountability
Every task has clear ownership and responsibility
Simplified Delegation
Easy task assignment and reporting structure
Secure Access
Role-based data access and permissions
Easy Onboarding
Quick user setup with bulk invite options
Workload Distribution
Accurate task distribution across teams